 |
| 207nm |
Launching fees: £0 - using the excellent public facilities at Mount Batten, Plymouth
Car and trailer parking: £0 - on street parking
Marina berthing fees: £0 - why bother when you can spend seven nights in free anchorages?
This is my brand of cruising, and proves that boating doesn't have to be expensive. Anchoring isn't difficult and, in Drascombes which can take the ground, can be flexible and peaceful. I find it works best to avoid the 'known' anchorages since, what the guidebooks really mean is somewhere for a deep keeled boat to avoid grounding. Look for somewhere close in to shore, with a reasonably flat, non-rocky sea bed. Arriving at low tide helps one appreciate the lie of the land in this respect. In this way, one can find real seclusion.
Day 1: Plymouth to Salcombe
I actually trailed down the previous evening, slept aboard on the trailer on the road adjacent to the slipway and then launched early the next morning. Apparently, this slip can get very busy, and the 'free' parking can be difficult to find at such times. There were no such problems at 7am on a Tuesday morning. I did pop back the following Sunday just to check the car and trailer were still there, and the free parking was all being used. If you like, there is the option of paying to park on Mount Batten Centre land, but this is costly at £10 per day (£5 for car, same for trailer) and the car park looks no less secure than the open road.
There is a choice of two slipways, and both look good - the wider one looks good for all tide usage.
After launching, I popped over to Barn Pool to anchor for breakfast.
 |
| Breakfast at Barn Pool |
It was just after HW, and there had been gales over the previous few days so, despite winds being light and southerly, there was a punishing swell beyond the Plymouth breakwater -in fact, seas were breaking over the breakwater. As ever, photos don't do it justice, but it was a bumpy trip, mostly with the tidal flow up to Salcombe. Initially, I was tempted to turn back and wait for promised better weather later in the week, but was glad to stick with it, rewarded by a challenging sail and much relief once I'd rounded some very confused tidal races off Bolt Head, anchoring in the relative comfort of Starehole Bay for a late lunch at low water.
 |
| Great Mew Stone looks untroubled and the camera does a good job of flattening the sizeable swell. |
 |
| Anchored for lunch in Starehole Bay. |
I was waiting for sufficient water to take me further upstream to Kingsbridge. The reward was a lovely quiet anchorage on a falling tide - Daisy II dried out on seaweed and all was still until the tide returned the following morning for breakfast!
 |
| Perfect evening anchorage, drying out overnight, opposite the lights of Kingsbridge |
 |
| 28.5nm |
Day 2: Salcombe to Dart
The swell hadn't diminished overnight. In fact, winds the previous afternoon seemed to have whipped up the seas even more and, again, I was tempted to give in but persisted. Once beyond Prawle Point, I felt comfortable setting sail in F4 southerly winds. The promised tidal races off Start Point, intriguingly, hadn't yet set in and, having given it a wide berth, I followed a catamaran across the projected position of these races into the welcome comfort and shelter of Start Bay for a very pleasant run along some splendid shoreline along to the River Dart.
 |
| Again, the camera has flattened some challenging seas off Start Point. |
 |
| Entrance to the River Dart |
 |
| Kingswear Castle guarding the eastern shoreline of the entrance to the River Dart... |
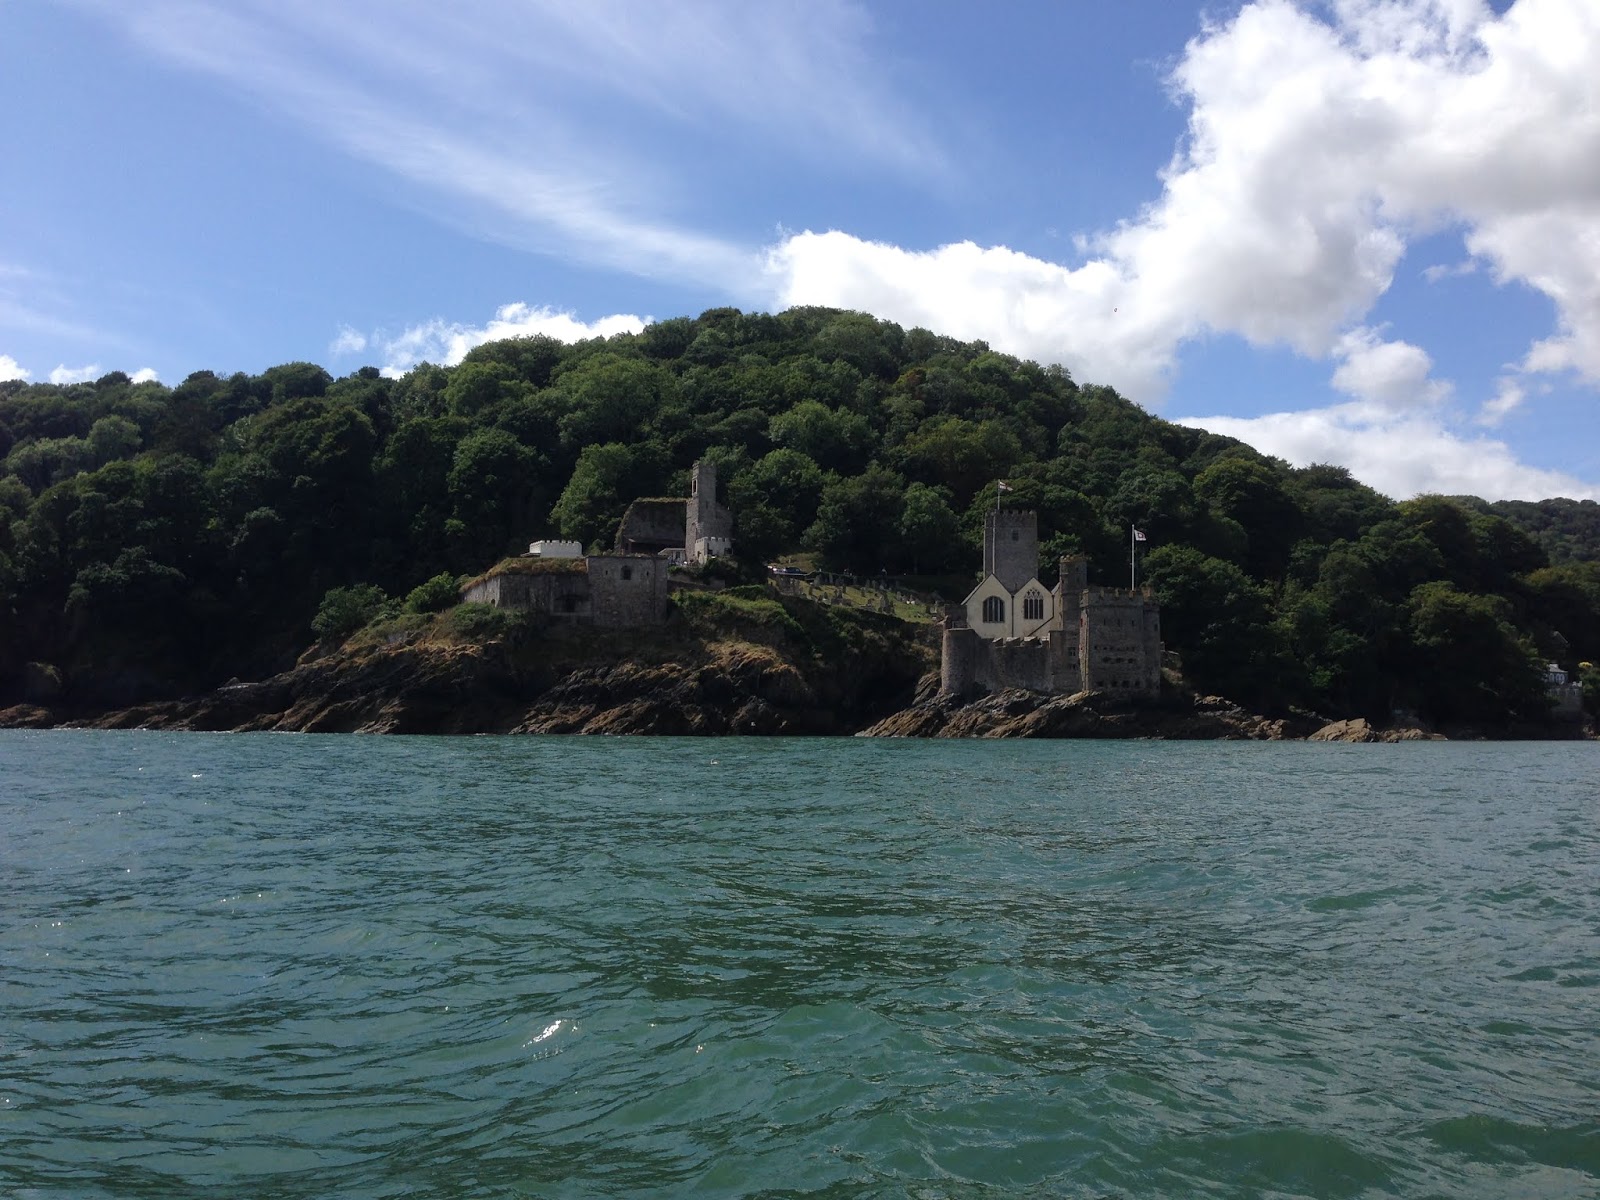 |
| ...and Dartmouth Castle guarding the opposite shoreline |
Dartmouth is an impressive and busy place for mariners. I motored carefully through the initial parts of the harbour, picking a safe passage amongst the many chartered boats and ferries. I was aiming for a known anchorage just off Dittisham Mill Creek and, tired from previous exertions, was content to stop there mid-afternoon into the evening, remaining afloat.
 |
| 25.9nm |
Day 3: Exploring Dart and return trip to Tor Bay
The trip upstream to Totnes was charming, if windless. Totnes is something of a pilgrimage for Daisy II marking her return to the site of the factory at which she was built in 1997. The factory has long since disappeared since the demise of the old Honnor Marine business in that same year. I understand the original factory was somewhere on the bank beyond the ferry in the picture below.
 |
| Public moorings at Totnes. Daisy II was 'born' here 21 years ago... |
Leaving Totnes behind, the next stage in the voyage involved a splendid sail, in a southerly breeze, round the Mew Stone, marking the eastern entrance to the Dart, along the coast to Tor Bay and the 'English Riviera'.
 |
| East Blackstone marking the turn of the coast NE to Berry Head |
 |
| Berry Head and the entrance to Tor Bay. |
 |
| Mew Stone on the return to the River Dart |
 |
| Dried out for the night off Gurrow Point |
 |
| 37.7nm |
Day 4: Dart to Salcombe
 |
| Bow Creek, which has a handy pub with moorings - not utilised on this trip but noted for future |
 |
| Delightful shoreline shapes in Start Bay |
 |
| Afternoon anchorage off Slapton Sands |
 |
| 36.2nm |
Day 5: Salcombe to River Yealm
Day 5 began with an incoming tide, and the opportunity once again to explore the upper reaches of an estuary. So, Frogmore Creek beckoned. It's another creek at the end of which ought to be a pub but no evidence was seen. Row/sailing was employed with the ebb when returning to the main channel of the estuary, including a pleasant beat along the reach up to Halwell Point. At this point, the wind was shielded by the hills around the estuary, so engine was deployed to begin the long trip round Bolt Head and back down the coast to the Plymouth area.
 |
| Craggy rocks guarding the western entrance to Salcombe Harbour |
 |
| Intriguing caves on the shoreline between Bolt Head and Bolt Tail. |
 |
| Hope Cove - memories of previous beach holidays here... |
 |
| Burgh Island |
The target was to reach the River Yealm - a delightful smaller estuary, almost entirely devoted to leisure boating.
 |
| Entrance to the River Yealm. The white triangular navigational markers evident, mid picture, amongst the trees help sailors navigate a passage avoiding the sand bar which stretches from the northern shore across a substantial part of the entrance. |
 |
| The River Yealm is another absolute delight. I found a covenient evening anchorage to dry out in mud off Shortaflete Creek. |
 |
| 27.1nm |
Day 6: Rivers Yealm to Lynher
The first job today was to explore the delightful River Yealm.
 |
| Public pontoon with facilities on the River Yealm. The harbourmaster was happy for me to stop here for 20 minutes, which was handy, amongst other things, for recharging my water supplies. |
It was pleasing, today, to return to Plymouth and explore this wonderful estuary prior to pulling out. Working my way round the Great Mew Stone I had intended to explore Cawsand Bay on the western side of the breakwater. However, a good F4 south easterly made a lunchtime anchorage on the other side a more sensible proposition.
Passing through the eastern channel, I could see plenty of yachts anchored in Jennycliff Bay, and as I headed towards them, I was hailed over the VHF by the skipper of Drifter 22 Puffin, who had initially advised me on sensible launching locations for this trip. I pulled up alongside for lunch and a pleasant chat.
It was then time to part company. Initially, I wanted to check that the car and traiiler were still ok, having been abandoned six days earlier in a public place. Fortunately all was fine.
 |
| The public jetty at Mount Batten makes a very convenient place to go ashore for short periods. Pulling up on the inside, here, one avoids the regular ferry running between here and other parts of Plymouth. |

 |
| In the foreground, a submarine is moored. We don't see many of those on the east coast! Interesting to note the depths just off Barn Pool on the entrance to Hamoaze which are in excess of thirty metres. |

 |
| 23.3nm |
Day 7: River Tamar, then return home
The plan, today, was to head as far up the River Tamar as tides would allow. In the event, whilst the tide was favourable, winds were very light and I indulged for rather too long at low speeds prior to resorting to the engine.
Still there were some splendid scenes, particularly of bridges.
Calstock is, I understand, well worth the trip but, in the event I only reached as far as Cotehele Quay which, nonetheless, made for a very pleasant lunch stop.
 |
| Cliffs off Weir Point, near Cargreen |
 |
| Lunch stop at Cotehele Quay |
After lunch, I encountered the coaster Dewinieth with its wonderful high peaked main sail. It looked a bit of a handful - not sure I'd want to be working with that much sail, but a real picture, nonetheless, and very effective at working upwind.


 |
| Coaster Dewinieth beating south towards the Tamar Bridge. |


 |
| Fortunately, Dewinieth's skipper took some return pictures of Daisy II! |
Finally, I worked my way back along the Hamoaze, before passing through the Drake Channel and returning to Mount Batten, and the long dive home.
 |
| 28.3nm |
